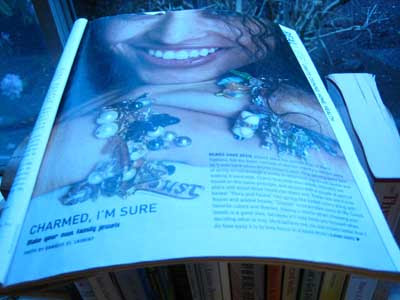
The Spring 2003 issue of Bust Magazine taught me how to make chunky charm bracelets. I started to make one when I got the magazine in my mail box five years ago, but I didn't finish it until last year. I finished my second bracelet, the one pictured above, yesterday.
I'm already scheming about my next bracelet, so hopefully it takes me less than a year to finish. It helps that I actually visited my local bead store to get some new inspiration; my first two bracelets were made from material that I've had kicking around for years.
I also found some inspiration on the Internet. I really like the designs by Jodi Bloom, especially this custom bracelet, which is loaded up with treats. She sells her jewelery on her retail website So Charmed, and this interview for StyleMaven suggests she was also inspired by the Bust article pictured above. She's just like me, except she's turned her inspiration into a lucrative career.
My favorite Internet discovery is this bracelet by Wise Craft. I love the homemade fabric charms! I can make my own charms!
I also like this two tone bracelet by Miss Kerry Turner because it's so contrary to the multicoloured array of charm bracelets I've come across. I think various shades of the same colour would work too.
Do you want to know how to make your own charm bracelet? I tracked down some basic instructions for those of you that don't have a stack of Bust magazines to search through, but I think you should just gather the supplies together and start experimenting.
This is what you need:
> Pliers are used to manipulate the head pins and jump rings so they connect to the chain. Round nose pliers are ideal for this type of project, but I managed to make my first bracelet with trusty old needle nose pliers from my tool box.
> A wire cutter is needed to cut the head pins and the chain down to the right length. Most needle nose pliers have a built-in wire cutter.
> Your chain must be chunky enough to handle all of your charms and beads. Cut it so it fits loosely around your wrist, and add a fastener of your choice with your pliers.
> Head pins and jump rings will allow you to attach your beads and charms to your chain. Buy them in bulk because you never know how many you'll need; some of you might be satisfied with 20 attachments per bracelet, but others will add as many as 80. I only used 40 in the bracelet pictured above.
> Collect a bunch of beads and charms for your bracelet. You can see from the photos and the links that many bracelets follow some sort of theme or colour palette, but you should want do whatever you want. Right?
Now go! And remember to add your suggestions, because I'm new at this.
Wednesday, March 12, 2008
Making charm bracelets
Labels:
Beads,
Crafts,
Jewelry,
Things Worth Making
Subscribe to:
Post Comments (Atom)

7 comments:
Hey Lady,
I've only made this one so far http://www.list4all.com/www3/re-up/59-1.jpg
Is it really a charm bracelet? I dunno. I'm hoping to make more with fun stuff all over. Yours is so cute!
first of all, i love the new blog header, very minimalist and lovely.
second of all, I have never thought about charm bracelets beyond those of childhood, laden with little ponies and what not, but now, I find myself inspired to make one.
I don't know what it will look like, but it won't have any ponies. or only ironic little ponies. or bad-ass little ponies. or, you know, something like that...
hi buddy, i love your blog, caden is so cute! love nanders
i've done a lot of beading in my time but it always seemed to be necklaces and earrings. you've inspired me to branch out...but didn't i give you all of my misc beading tools and bits? hmmmmmm.
Jesse, I love your bracelet. Is it for sale? Tell us where to find it!
Robyn, you can bet that I'll be making you a bracelet as a thank you for passing on your old beading supplies.
nice photo of your bracelet.
i'm not one for bracelets myself (unless they have manly charms like nuts & bolts), but the photo is fantastic.
Thanks Imti! I've been having fun with the photos on this site. I took that photo when I was losing my natural light window, and I like how it turned out.
Post a Comment